Table of Contents
Over the past week, some of our readers have told us that they have learned how to set a wallpaper for the Windows 7 login screen.
Approved
Changing The Set Of Windows 7 Login Screen Buttons
You may find that the login screen buttons still look dull against the login screen background. In this case, users try to change the set using the button color and texts that match the image. Follow these steps to make the expected changes.
Enable Custom Wallpaper In Windows 7
For Windows 7, this setting is specific to device manufacturers. you want to customize their systems, but you certainly don’t have to use them yourself. All you have to do is also change one case of the values, and put the image file in all the appropriate places.
How Do I Change The Background Image Of The Login Screen?
H2> As You Like. To Do Anything With The Monitor, You Need To Register To Download And Install Actual Window Manager Or Actual Multiple Monitors. During The Build, The Quick Setup Wizard Will Prompt Your Company To Customize The Login Screen.

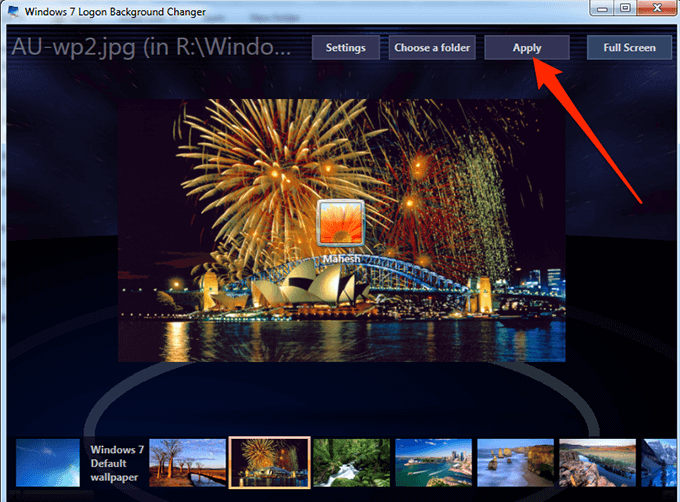
Set A New Background Image For The Membership Screen.
Here is the part of the process that youreally like it. Now that you have the ability to change the wallpaper for any of our Windows 7 login screens, you can choose an image as your background for specific purposes.
Where Is The Windows Login Screen Background?
Go to Settings > Personalization > Lock Screen and even turn on “Show Screen Background Image”. “Lock screen on login screen.” tactics here. You can usually also customize the wallpaper you want on the login lock screen settings page.
Creating A Folder
In the second part of the usage, you will need to create one of several folders created. First, open Windows Explorer. Then go to the C:WindowsSystem32Oobe folder. Once you’ve navigated to the Oobe folder, click the New Folder icon in the Windows Explorer toolbar. You will see a confirmation dialog similar to Figure D. When you click Next, the newly purchased folder will be created and you can name it Info.
The software to fix your PC is just a click away - download it now.![]()
![]()
![]()
![]()
![]()
![]()
![]()
![]()
![]()
![]()

Related posts:
 What Are The Reasons How To Enable Interactive Logon In Windows XP And How To Fix It?
 What Are The Reasons How To Use Rendom.exe In Windows Server 2008 And How To Fix It
 What Are The Reasons For The Impossibility Of Initializing The USB Ret 120 Subsystem And How To Fix It?
 What Reasons Require Direct X 9 And How To Fix It