Table of Contents
Recently, some of our readers reported to us that they encountered the steps to set up DHCP on Windows Server 2008.
Approved
You must first click on Server Coordinator. Click Roles. Click Publish Roles. On the Before You Begin screen, if you can still find it, click Next. And put a new checkmark next to the DHCP server. And click Next.
First you need to “Remote Push Computer Manager”. Click Roles. Click Add roles. Click “Next” on the “Before You Begin” screen if you’re really done. And check the box next to the DHCP host. And click Next.
Continuing our computing fundamentals series, this morning we’ll show you a specific method for configuring DHCP on Windows Server 2008, rather than using it high up on a router.
Note. This part is an ongoing series of tutorials on working with the basics of computer applications and may not be suitable for everyone.
Step 1: Open Server Manager. Click the Start button, then click Primary Server Manager.Step 2: Add roles and other features.Step 3. Select a role-based installation, optionally a role-based installation.Step 4: Choose your home server.Step 5: Select Server Tasks.Step 6: function, DHCP server.Step 7: check.
This guide assumes that you are running Server 2008 on one computer. If not, you should read our guide to installation methods. You should also have set a static IP address for the server before proceeding.
To get started, launch Server Manager, click Roles, and select Add Roles. becomes normal
A DHCP server is a simple network server that automatically provides and assigns IP addresses, standard gateways, and other network parameters to client detectors. DHCP servers usually assign each individual client a unique dynamic IP address that changes when the user leases that IP address and flows.
The “Before you check” screen will appear and after clicking “Next” you can select a DHCP server.
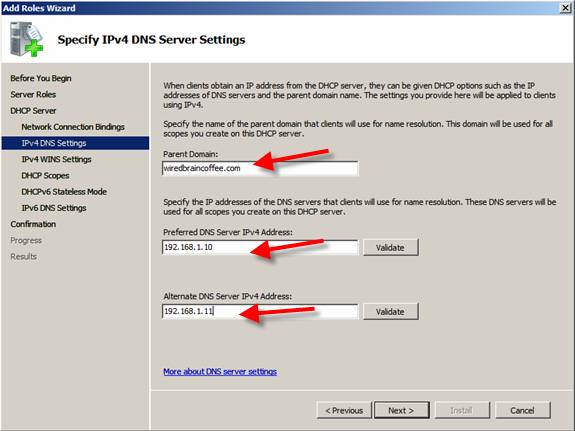
Then you need to select the Internet connection to which DHCP will be bound by default. IP address
Enter your DNS server, in this particular case it is the same but computer, be careful not to enter its loopback address (127.0.0.1) because that will give c an address that your clients will continue to resolve. Click
Enter the following command to start the DHCP product: number /etc/init.d/dhcp start.To stop the DHCP service, enter the following command: # /etc/init.d/dhcp get rid of. The DHCP daemon will stop until it is manually restarted or the system is restarted.
However click to “Next” to skip the setup. When you win, you can create another DHCP scope in which you can click the “Add” button.
Once your company has clicked “It’s OK”, you can click “Next” four times to proceed to a confirmation screen where users can finally click “Install”.

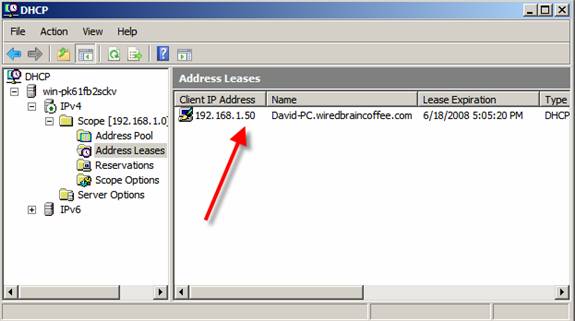
Once the DHCP update is complete, yours is working exceptionally well and you can start selecting a DHCP server right away.Readabilitydatatable=”0″>
| Managing a specific Windows 2008 R2 Server DHCP server from the command line |